Upland BlueVenn's Omnichannel Marketing Hub, Engage, provides tools to construct your marketing campaigns and build customer engagement.
You can define specific audiences for your campaign. You initially define an audience domain which defines the audience at a high level, such as only those individuals who have opted in for email contact. Then you can further refine how that audience is divided up, if you wish, based on specific criteria. Then each sub-group can be assigned a different action or set of actions, such as special promotions, anniversary recognitions, and the like.
To see a list of the Campaigns and Journey Planners already available in the system, select the megaphone icon in the Navigation pane. You can open an item (right-click and select Open from the context menu) to display and edit the item.
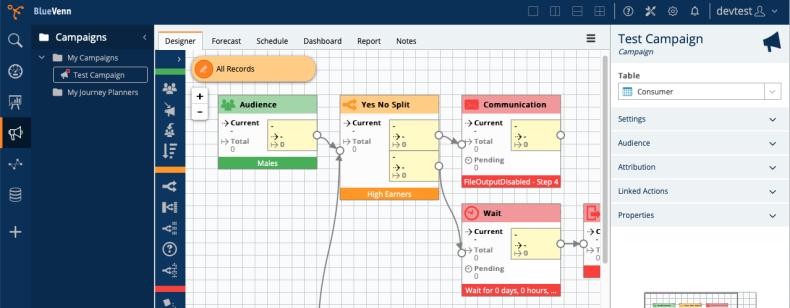
Starting a New Campaign
The Campaigns menu includes options for building a campaign using a wizard or starting with a blank canvas. With each method, you define the audience that you want to reach, add control logic to divide the audience into two or more groups, if necessary, then specify what campaign actions you want to take for each audience segment. To start a new campaign:
-
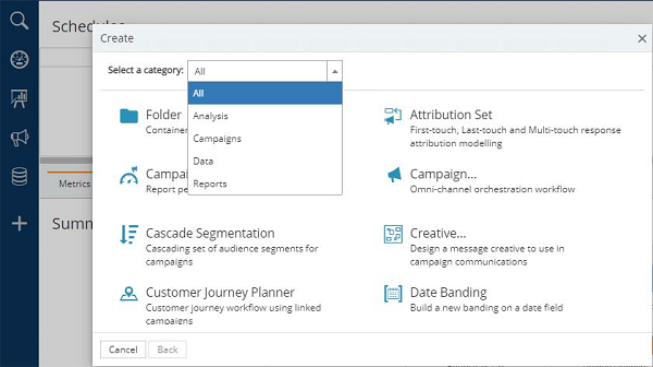
Click the + icon in the navigation pane and select the Campaigns category in the Create menu.
-
Select Campaign... from the available options. This provides you with a second menu with the option to start from a blank canvas or use a campaign wizard.
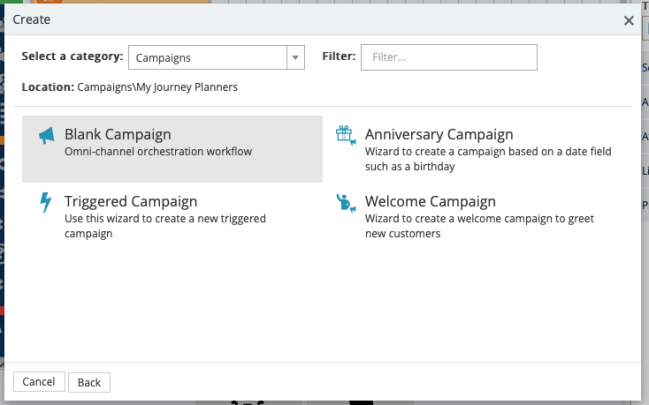
The process for building the campaign depends on whether you select Blank Campaign or one of the Campaign Wizards. Regardless of which choice you make, you arrive at the Campaign Window.
The Campaign Window
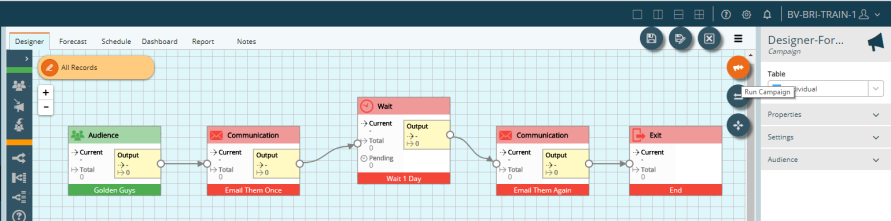
The campaign window contains common elements, including a campaign domain field, a campaign properties pane, and a campaign steps menu.
If you choose to build your campaign using a campaign wizard, the campaign designer pane will be pre-populated with steps based on the choices made during set up. If you choose a blank campaign, you will need to drag and drop steps from the campaign steps menu.
Campaign domains
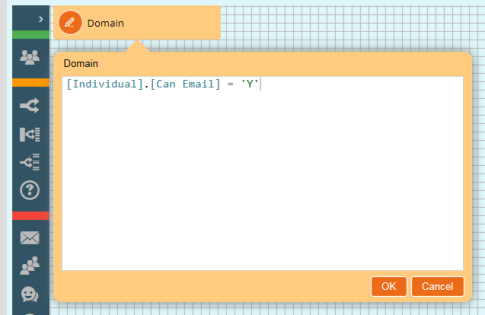
Campaign domains are configured in the top left corner of your campaign workspace and allow you to configure a master rule that manages which records enter a campaign. This allows you to create audience selections before your audience steps calculate. For example, you may want to restrict candidates to only those who have given you permission to email them.
.
You can also rename the domain for better readability.
Campaign steps
Campaign steps are the building blocks of your campaign and are divided into three groups within the campaign steps menu.
- Audience Steps select the individuals to be included in the campaign from the audience determined by the campaign domain.
- Decision Steps build the logic needed to process the audience and move them through the various actions in the campaign.
- Action Steps manage the flow of the campaign, process data, and send audiences to communication channels based on your criteria.
Campaigns require a minimum of two steps, an audience and an action to perform. For more complex campaigns, you may wish to add decision steps.
Campaign properties
When editing campaigns, the properties panel on the right of the workspace dynamically changes, depending on the step you click. When you click on the blank campaign workspace, you are shown the properties panel for the campaign itself. Each of these options gives you flexibility to edit settings for your campaign.
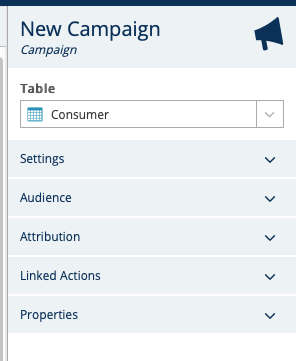
Table
The table field allows you to select the table at which your campaign data is stored, e.g. Consumer.
Settings tab
Settings allows you to configure some operational settings for your campaign:
-
The Start Date - When a Campaign is created this field is populated with the current date and time but you can change it as you wish. Campaigns cannot be scheduled until the Start Date has passed. An example of usage might be that you write a Campaign today, but the Campaign is not due to run until later in the year. Setting the Start Date makes sure that no one can accidentally schedule it to run ahead of time.
-
The End Date - When a Campaign is created this field defaults to the date 3 years in the future. You can change it as you wish. Scheduled Campaigns will stop running once the End Date has passed.
-
Store Campaign History - By default this will be set to "Yes", which means when the campaign runs it will store historical information on the run volumes, date, steps used and all other metrics the campaign will retain. "No" will prevent the campaign writing to your history table, which is useful for ad hoc data outputs which are not necessarily part of a customer journey.
Audience tab
The Audience tab allows you to configure how your audience settings can be managed:
The audience options field allows you to choose how an individual gets added to a campaign:
-
Always Add - qualifying individuals will enter the campaign every time it runs.
-
Add Only on First Run - used when you want the campaign to run multiple times. e.g. to allow people to make choices, get reminders, and respond to messages, but you want to send the initial offer to just the original Audience selection.
-
Add Only Once - allows individuals to only enter a campaign once. Once a contact has entered this campaign they are forever prevented from re-entering the campaign through any Audience steps.
-
Add between these dates - used if you are running a campaign where you need to stop adding customers prior to a campaign's end (such as buying tickets for an event). The campaign would have an end date so that it doesn't run after the date of the event and, as with the above example of "Add only on first run", you want the campaign to run multiple times, but you need to stop adding new candidates a few days before the date of the event to give you time to ship the tickets. In this case you would use the Add between these dates option. This means your campaign can continue to run to move records through the journey, without having to manually prevent new records from feeding into the campaign after a certain time.
The audience priority field is used for campaigns with multiple audiences to re-order the audience priority. By default, the prioritization is based on the order in which the Audience Steps were added.
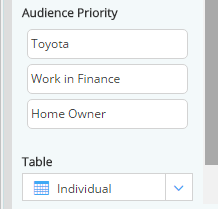
Note: Changing the position of an audience on the canvas does not change the prioritization. Best Practice would suggest that if you change your audience priority, you re-position the Audience Steps in the design window to match to avoid confusion.
Attribution tab
Campaign Attribution allows transaction dates to be attributed to Campaign Communications.
Properties tab
-
Categories (Optional) - Where you can assign a category to your campaign. For example, if this campaign is part of an onboarding customer journey, you may want to assign each campaign to a category of "Onboarding". When you then search for this, all campaigns under that category will appear.
-
Description (Optional) - Free text area used to assign a description to this campaign.
As well as allowing you to assign a category and description to each campaign, the Properties panel will also display the following information:
-
Campaign ID - Defaults to 0 until the campaign is saved. Once saved, the campaign is given a Unique ID which can be used for campaign history selections.
-
Last Modified By User - Returns the username login for the user who last edited the campaign.
-
Last Run Number - Displays the most recent run number this campaign has had. For example, if this campaign was scheduled to run every hour, by day 2 this would display last run number as 24.
-
Last Run Date - Displays the date of the most recent run..
Managing a campaign
Once you have built and saved your campaign, you can use the other Campaign features to forecast a campaign's cost and reach, set a schedule for a campaign, build email creatives for your customer communications, and attribute transactions to a campaign.